

Basic CPR first aid training can mean the difference between life and death when someone collapses in front of you. According to the American Heart Association, CPR performed immediately can double or triple a cardiac arrest victim’s chance of survival.
Here’s what basic CPR first aid training covers at a glance:
- Scene safety and assessment – Checking for dangers, calling 911, and prioritizing care
- CPR (Cardiopulmonary Resuscitation) – Chest compressions and rescue breaths to keep oxygenated blood flowing when the heart stops
- AED use – Operating an automated external defibrillator to restore a normal heart rhythm
- First aid skills – Managing bleeding, choking, shock, heart attacks, strokes, and other emergencies
- Certification – A nationally recognized completion card valid for two years from an approved provider like the American Heart Association (AHA)
Most courses take just a few hours. Many people — from parents and teachers to office workers and healthcare staff — are required to hold a current certification.
The hardest part isn’t the training itself. It’s knowing you’re prepared before an emergency happens.
When a medical emergency strikes, the minutes before emergency medical services (EMS) arrive are the most critical. Sudden cardiac arrest is one of the leading causes of death worldwide. During cardiac arrest, the heart abruptly stops beating effectively, halting blood flow to the brain and other vital organs. Without intervention, brain damage begins in as little as 4 to 6 minutes, and survival rates drop by roughly 10% for every minute that passes without help.
This is where the Chain of Survival comes into play. The Chain of Survival is a series of critical steps that, when executed rapidly, dramatically improve a person’s chances of surviving cardiac arrest. The first links in this chain — immediate recognition of cardiac arrest, calling 911, and starting high-quality chest compressions — rely entirely on bystanders. To understand the science behind these steps, you can read more about What is CPR and Why Do We Do It?
Why Get Certified in Basic CPR First Aid Training?
Enrolling in a structured course and obtaining your CPR First Aid Certification does more than check a box for employment. It gives you the physical muscle memory and psychological confidence to act when others freeze.
Many people hesitate to help because they fear making a mistake or causing further injury. However, attempting CPR is always better than doing nothing. Hands-Only CPR, which consists of continuous chest compressions without rescue breaths, can double or triple survival rates for sudden cardiac arrest when performed immediately. Professional training teaches you how to keep oxygen-rich blood circulating to the brain until advanced medical help arrives.
Who Needs Basic CPR First Aid Training?
While emergency preparedness benefits everyone, certain professions require active certification by law or regulatory standards.
- Teachers and School Staff: Keeping children safe is a major responsibility.
- Childcare Providers: Daycare workers, babysitters, and preschool teachers must be ready for pediatric emergencies. In California, childcare licensing requires specific training. The Pediatric CPR First Aid class must be taken in the instructor-led, fully in-person format to meet California EMSA and childcare-licensing requirements; the Blended Learning format does not satisfy them.
- Workplace Safety Responders: Many corporate offices, construction sites, and manufacturing facilities designate employees to meet OSHA compliance standards.
- Healthcare Professionals: Nurses, EMTs, paramedics, and dentists require a higher level of training known as Basic Life Support (BLS).
For general workplace and community requirements, a standard CPR Certification is the perfect fit.
Comparing CPR, AED, and First Aid
It is common to see these three terms grouped together, but they cover distinct lifesaving skills. A comprehensive training program integrates all three so you can handle a wide range of emergencies.
| Discipline | Core Purpose | Key Skills Taught |
|---|---|---|
| CPR | Keeps oxygenated blood flowing when the heart has stopped. | Chest compressions, rescue breathing, and airway management. |
| AED | Delivers an electrical shock to reset a heart in an abnormal rhythm. | Pad placement, following voice prompts, and safety precautions. |
| First Aid | Treats non-cardiac medical emergencies, injuries, and environmental trauma. | Bleeding control and tourniquet use, splinting, epinephrine auto-injector use, and burn care. |
Step-by-Step Lifesaving Protocols
Before you perform any physical intervention, you must assess the situation. The very first step in any emergency is checking the scene for safety. If the scene is unsafe — due to fire, traffic, toxic fumes, or live electrical wires — do not approach the victim. Call 911 immediately and wait for professional first responders.
If the scene is safe, approach the person and check for responsiveness using the “shout-tap-shout” method. Shout, “Are you okay?” and firmly tap their shoulder. If they do not respond, are not breathing, or are only gasping (known as agonal respirations, which should be treated as non-breathing), you must act fast. Direct someone nearby to call 911 and retrieve an AED, then immediately begin chest compressions.
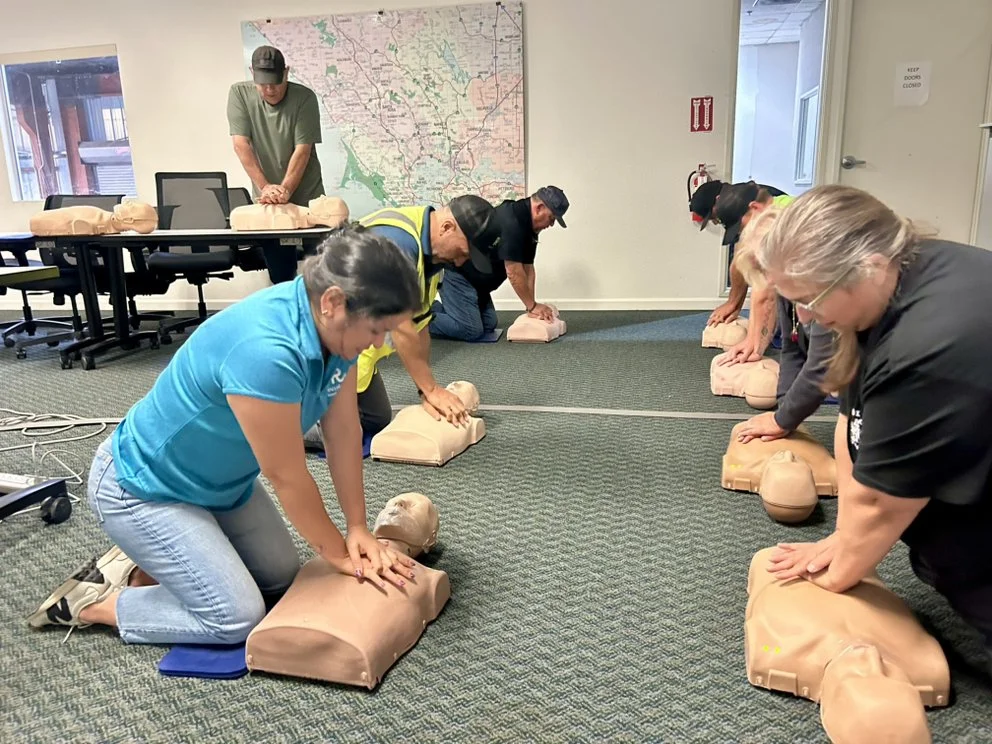
Performing CPR on Adults, Children, and Infants
The American Heart Association and international guidelines emphasize the C-A-B sequence: Compressions, Airway, Breathing. This sequence ensures that chest compressions begin as quickly as possible to keep blood moving. To master these physical skills, it helps to review the core concepts in Do You Know How to Perform CPR?
Adult CPR Protocol (Puberty and Older)
- Positioning: Place the person on their back on a firm, flat surface. Kneel beside their chest.
- Hand Placement: Place the heel of one hand in the center of the chest (on the lower half of the breastbone) and interlock your other hand on top. Keep your elbows locked and shoulders directly over your hands.
- Compressions: Push hard and fast. Compress the chest to a depth of at least 2 inches (but no more than 2.4 inches) at a rate of 100 to 120 compressions per minute. Allow the chest to fully recoil between compressions.
- Airway & Breathing: If you are trained and have a barrier device, open the airway using the head-tilt, chin-lift maneuver. Give 2 rescue breaths, each given over about 1 second, making sure the chest visibly rises.
- Ratio: Continue cycles of 30 compressions and 2 rescue breaths. Minimize interruptions to compressions to less than 10 seconds.
Child CPR Protocol (Age 1 to Puberty)
Children have smaller, more fragile bodies, requiring minor adjustments to your technique.
- Hand Placement: Use either one or two hands in the center of the chest, depending on the child’s size.
- Compressions: Compress the chest to a depth of about 2 inches at a rate of 100 to 120 compressions per minute.
- Ratio: Use the 30:2 ratio – 30 compressions to 2 breaths.
- To cross-reference clinical guidelines, review the Mayo Clinic’s resource on Cardiopulmonary resuscitation (CPR): First aid.
Infant CPR Protocol (Under 1 Year Old)
Infants require delicate, precise care to avoid skeletal damage.
- Hand Placement: Place hands around the chest with two thumbs in the center, on the lower half of the sternum, just below the nipple line.
- Compressions: Compress the chest to a depth of 1.5 inches at a rate of 100 to 120 compressions per minute.
- Breathing: Cover both the infant’s nose and mouth with your mouth (or a pediatric pocket mask) to deliver gentle rescue breaths.
- Ratio: Use a 30:2 ratio of 30 compressions to 2 breaths.
How to Use an Automated External Defibrillator (AED)
An AED is a smart, user-friendly device that can analyze a victim’s heart rhythm and deliver an electrical shock if needed. It is designed to be used by anyone, even those without formal medical training. As soon as an AED arrives at the scene, open the case and turn it on. The machine will guide you with clear voice prompts.
- Expose the Chest: Remove all clothing from the victim’s chest. Ensure the skin is dry.
- Apply Pads: Apply the adhesive AED pads directly to the bare skin. Place one pad on the upper right side of the chest and the other on the lower left side (below the armpit). For children under 8 years old, use pediatric pads if available. If pediatric pads are not available, use adult pads, ensuring they do not touch or overlap (place one on the center of the chest and one on the center of the back if necessary).
- Analyze: Plug in the connector cable if necessary. The AED will tell everyone to stand clear while it analyzes the heart rhythm. Do not touch the victim during this time.
- Deliver Shock: If the AED advises a shock, ensure no one is touching the victim. Shout “Clear!” loudly, look to confirm safety, and press the flashing shock button. A fully-automatic AED will deliver a shock on its own, so be sure to follow the prompts and stand clear before the shock is delivered.
- Resume CPR: Immediately resume chest compressions after the shock is delivered (or if no shock is advised). Keep the AED pads attached; the device will re-analyze the rhythm every two minutes.
Responding to Choking Emergencies
Choking occurs when a foreign object blocks the airway. Recognizing the signs early is critical. If a person can speak, cough forcefully, or breathe, do not interfere — encourage them to keep coughing. If they cannot speak, have a weak cough, make high-pitched noises, or turn blue, they are experiencing a severe airway obstruction and need immediate help.
For adults and children over the age of one, use a combination of back blows and abdominal thrusts (also known as the Heimlich maneuver):
- Stand Behind: Wrap your arms around the person’s waist from behind.
- Fist Placement: Make a fist with one hand and place the thumb side slightly above the person’s belly button (well below the breastbone).
- Thrusts: Grasp your fist with your other hand and press into the abdomen with quick, upward thrusts.
- Alternative: If the person is pregnant or too large to wrap your arms around, perform chest thrusts instead, placing your hands on the center of the breastbone.
For infants under one year of age, the technique is different:
- Positioning: Hold the infant face down along your forearm, supporting their head and jaw with your hand. Rest your forearm on your thigh, keeping the infant’s head lower than their body.
- Back Blows: Deliver up to 5 firm back blows between the infant’s shoulder blades using the heel of your hand.
- Chest Thrusts: Support the back of the infant’s head and flip them face up along your opposite forearm. Deliver up to 5 quick chest thrusts in the center of the chest using two fingers.
- Repeat: Alternate between 5 back blows and 5 chest thrusts until the object is dislodged or the infant becomes unresponsive. If they become unresponsive, start CPR immediately and look inside the mouth for the object before giving rescue breaths (never perform a blind finger sweep).
For a detailed walkthrough of choking management, refer to the Canadian Red Cross First Aid & CPR guide.
First Aid Essentials: Medical Emergencies and Trauma
Beyond cardiac arrest, basic first aid training prepares you to respond to sudden illnesses and physical trauma. A systematic primary assessment — checking the ABCs (Airway, Breathing, Circulation) — ensures you address the most life-threatening issues first.
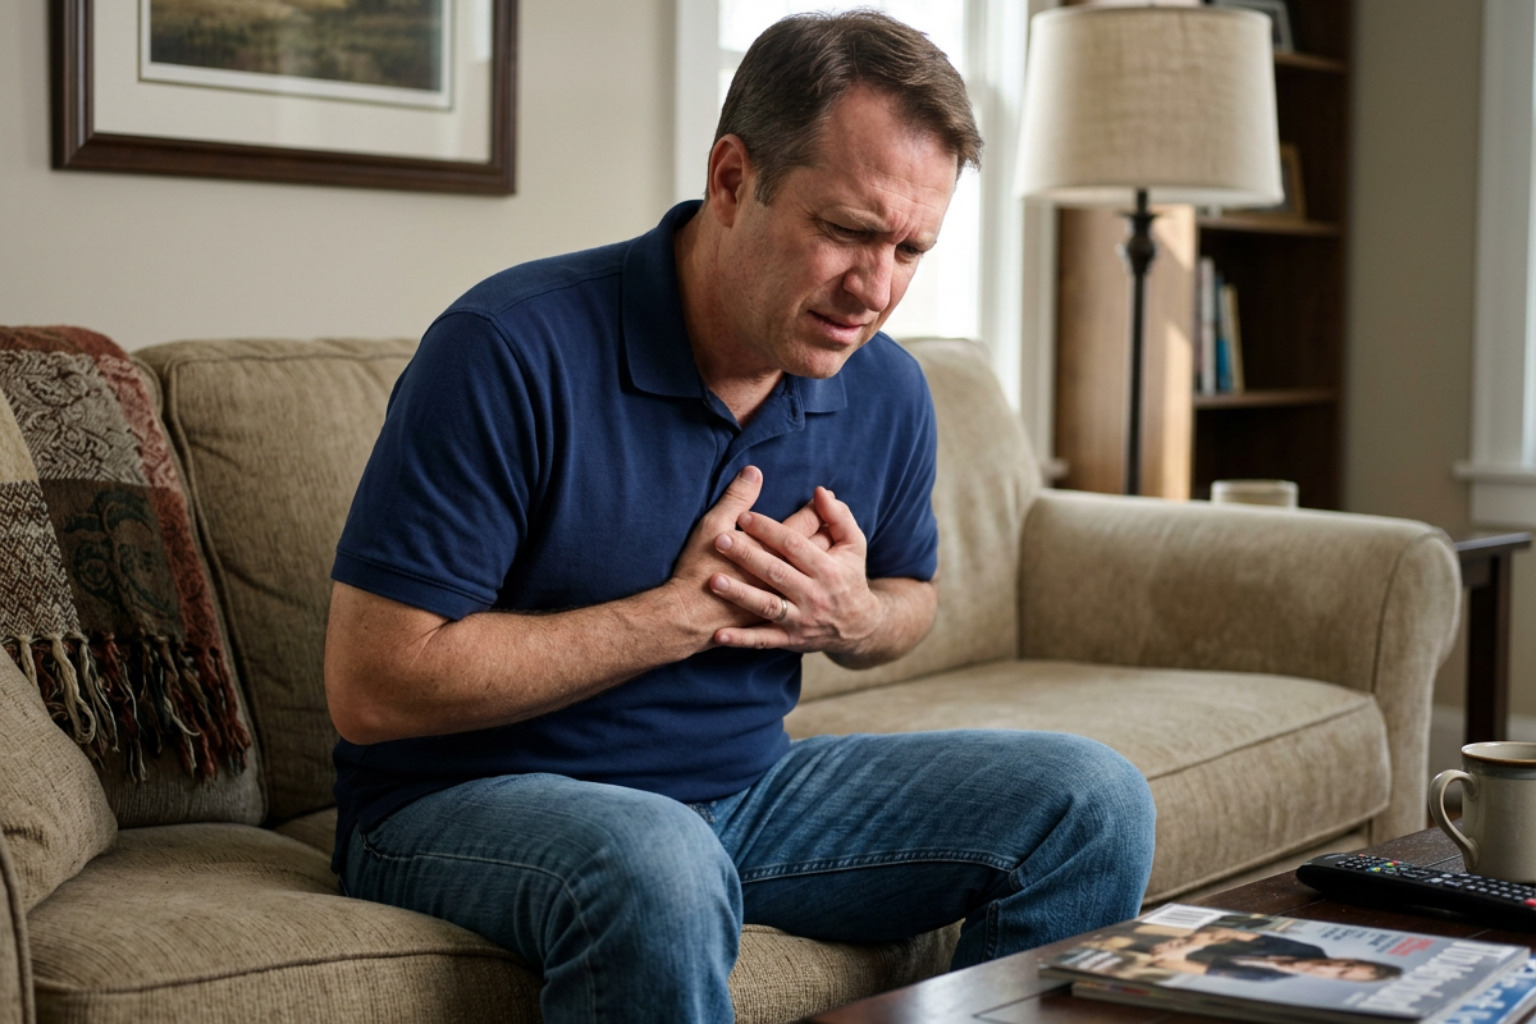
Recognizing Heart Attacks and Strokes
Heart attacks and strokes are cardiovascular emergencies where rapid medical care makes a massive difference in patient recovery.
- Heart Attack: Occurs when blood flow to a part of the heart muscle is blocked. Symptoms include persistent chest pain, pressure, squeezing, or fullness in the center of the chest. The pain may spread to the shoulders, neck, arms, or back. Other signs include shortness of breath, cold sweats, nausea, and lightheadedness. If you suspect a heart attack, call 911 immediately, have the person sit and rest, and assist them in chewing an aspirin if they have no allergies or contraindications.
- Stroke: Occurs when blood flow to the brain is interrupted. Use the FAST acronym to evaluate stroke symptoms:
- F – Face Drooping: Ask the person to smile. Does one side of the face droop?
- A – Arm Weakness: Ask them to raise both arms. Does one arm drift downward?
- S – Speech Difficulty: Ask them to repeat a simple sentence. Is their speech slurred or strange?
- T – Time to call 911: If you observe any of these signs, note the time symptoms started and call emergency services immediately.
Controlling Life-Threatening Bleeding and Shock
Severe bleeding can lead to death in a matter of minutes. Knowing how to stop the bleed is one of the most vital trauma skills you can learn.
- Direct Pressure: Apply firm, continuous pressure directly over the wound using a sterile dressing or clean cloth. Push down hard with both hands.
- Tourniquet Application: If direct pressure does not stop severe, life-threatening bleeding on an arm or leg, apply a tourniquet. Place it 2 to 3 inches above the wound, but not directly over a joint. Tighten the windlass until the bleeding stops, lock it in place, and note the exact time of application. For formal training in these techniques, consider taking a STOP THE BLEED® class, a program administered by the American College of Surgeons Committee on Trauma.
- Managing Shock: Life-threatening injuries can lead to shock, when the circulatory system cannot deliver enough oxygen-rich blood to the body’s tissues. Signs include pale, cool, clammy skin, a rapid pulse, rapid breathing, and confusion or restlessness. Have the person lie flat on their back, cover them with a blanket to keep them warm, and monitor their breathing continuously. Do not give them anything to eat or drink.
Infection Control and Secondary Assessment
Protecting yourself is just as important as helping the victim. Whenever you provide first aid, practice universal precautions — assume all bodily fluids are infectious.
- Always wear personal protective equipment (PPE), such as nitrile gloves and eye protection.
- Use a barrier device, such as a CPR Pocket Mask or a compact CPR Face Shield to prevent direct contact with saliva or blood during rescue breathing.
- Wash your hands thoroughly with soap and water for at least 30 seconds immediately after providing care.
Once you have completed your primary assessment and addressed any life-threatening issues (like severe bleeding or breathing problems), you can perform a secondary assessment. This involves asking the person questions about their medical history using the SAMPLE acronym (Signs/Symptoms, Allergies, Medications, Past medical history, Last oral intake, and Events leading up to the injury) and performing a head-to-toe physical exam to check for minor injuries.
Course Formats, Providers, and Legal Considerations
Choosing the right training format and provider is essential to ensure your certification is recognized by your employer or licensing board.
In-Person, Online, and Blended Learning Formats
Modern training offers flexible options to fit busy schedules, but not all formats are equal:
- In-Person Training: The traditional classroom setting where an instructor guides you through all lectures and hands-on practice. This format is highly interactive and provides immediate feedback.
- Blended Learning: A popular hybrid option. You complete the self-paced cognitive portion online at home, then attend an in-person, instructor-led Skills Session to practice and demonstrate your physical skills on a manikin. If you want to preview the online component, you can look at the 2025 Heartsaver® Basic – First Aid CPR AED Online curriculum. If you prefer this flexible path, you can enroll in our Blended Learning CPR First Aid Certification program.
- Online-Only Courses: While convenient, fully online courses do not include a hands-on physical skills demonstration with an instructor. Consequently, online-only certifications are not OSHA-compliant and are generally not accepted for workplace safety, school, or healthcare provider licensing.
At Vive CPR, our Skills Sessions are always completed in person with a live instructor. We do not use Voice-Assisted Manikin (VAM) training, ensuring you receive personalized, high-quality feedback.
Certification Validity and Renewal Requirements
Most major CPR and first aid certifications are valid for two years from the date of issue. To keep your skills current and maintain compliance, you must take another course before your certification card expires.
To help you stay on track, we maintain a comprehensive CPR Guide detailing renewal requirements. While standard certifications last two years, specialized programs have different timelines. For example, Bloodborne Pathogens certification is valid for one year and is issued as a paper certificate, while STOP THE BLEED® training does not expire.
Legal Considerations and Consent
Many people worry about legal liability when helping in an emergency. Fortunately, laws exist to protect well-intentioned rescuers.
- Good Samaritan Laws: These laws protect bystanders who act in good faith, without expectation of compensation, to provide emergency care within the scope of their training. They protect you from civil liability as long as you do not act with gross negligence or willful misconduct.
- Obtaining Consent: If a victim is conscious and alert, you must ask for permission before providing care. State your name, level of training, and ask, “Can I help you?”
- Implied Consent: If the victim is unresponsive, confused, or unable to communicate due to severe illness, consent is legally implied. You should begin lifesaving care immediately. For minors, if a parent or guardian is present, ask them for consent. If no guardian is present, consent is implied for life-threatening conditions.
Frequently Asked Questions
What is the C-A-B sequence in CPR?
The C-A-B sequence stands for Compressions, Airway, and Breathing. Resuscitation guidelines recommend starting with chest compressions first because keeping oxygenated blood circulating to the brain and heart is the highest priority. Opening the airway and delivering rescue breaths follow compressions.
Can I get certified fully online?
No, if you need a certification that meets workplace, OSHA, or state licensing requirements, you cannot use a fully online course. Most employers and regulatory boards require a physical, hands-on demonstration of CPR and AED skills, either with an instructor or a Voice Assisted Manikin.
What should I do if a victim refuses care?
If a conscious, mentally competent adult refuses your help, you must respect their decision. Do not touch them or force care, as this can be legally considered battery. Instead, stay nearby, call 911 to explain the situation, and monitor their condition. If they lose consciousness, you can then begin care under the principle of implied consent.
Conclusion
When a life-threatening emergency occurs, you do not want to look back and wish you had taken a class. Enrolling in basic cpr first aid training gives you the practical skills and confidence to act decisively when seconds count.
At Vive CPR, we are proud to be an American Heart Association (AHA) Training Site based in Rohnert Park, California. We serve Santa Rosa, Petaluma, Cotati, Windsor, Healdsburg, Guerneville, Sebastopol, Sonoma, Novato, San Rafael, and the wider San Francisco Bay Area.
Our classes are taught by professional first responders and healthcare professionals — firefighters, paramedics, registered nurses, and EMTs — who bring real-world emergency experience to the classroom. We offer flexible scheduling, including weekdays, evenings, and weekends, with same-day certification issuance upon successful completion.
Whether you need to meet workplace compliance, or simply want to protect your family, we are here to help. Register today for our CPR First Aid Certification Classes and take the first step toward saving a life.
